Pantera
Club
| Colorado Pantera Club |
|||
Rebuilding a Ford 351 Cleveland
Part 1: Removing the 351C from the Pantera
| The following is a photo essay that shows the basics of removing the 351C from a Pantera. I am by no means an expert, so take this as a guideline only. - Matt Hannes | ||
Other things to remove: - Valve covers. You could probably pull the engine with them in place, but if you've got nicely finished aftermarket ones, it's a good idea to remove them so they don't get chewed up by the hoist chains. - Air cleaner, carburator, fuel filter (and bracket). Of course you'll have to disconnect all carburator-related things, like vacuum advance, brake booster, choke, throttle, and any emissions stuff (if you have any!). Note: You'll notice in the photos that I had already removed my intake manifold to inspect the lifters. You don't need to remove the intake manifold to pull the engine. - Distributor and ignition cables. On Panteras, the distributor has a nasty habit of hitting the firewall when you tilt the engine/transaxle assembly forward to lift them out of the car, so it's best to pull it out before lifting the engine. - Starter motor. At a minimum, disconnect the cables. It is easier to un-bolt the starter motor when the engine is out of the car. - Fuel pump. Un-bolt it and let it hang to the side (or use zip-ties or wires to tie it off to something). - Clutch slave cylinder. - Speedometer cable (on passenger's side of the transaxle). - Back-up light plug (on rear driver's side end of the transaxle). - Transmission ground cable (on rear of transaxle). Un-bolt the end on the gearbox and set it aside. - AC condenser and fan. I left the hoses connected and wrapped the condenser in cardboard and tied it off to the side of the engine compartment. - Un-bolt exhaust headers. They don't have to be removed, although it might be good to remove them too if you're replacing gaskets and you want to clean up the mating surfaces. - Un-bolt the U-joint flanges on the transaxle. - Un-bolt gear shift linkage. I loosened the last U-joint (closest to the transaxle) and slid it off the splined shaft going into the transaxle. Set the linkage aside. - Water temperature sender (located on the front of the block). - Oil pressure sender. You can unscrew the sender and remove it altogether from the block, or just unscrew the wire connector. My sender unit was seized into the block so I left it in place and just disconnected the wire. - Oil temperature sender (if you have one). These are typically threaded into the side of the oil pan, usually on the front. - Don't forget to remove the deck lid! OK, now that the boring work is over, let's move on to the fun stuff!
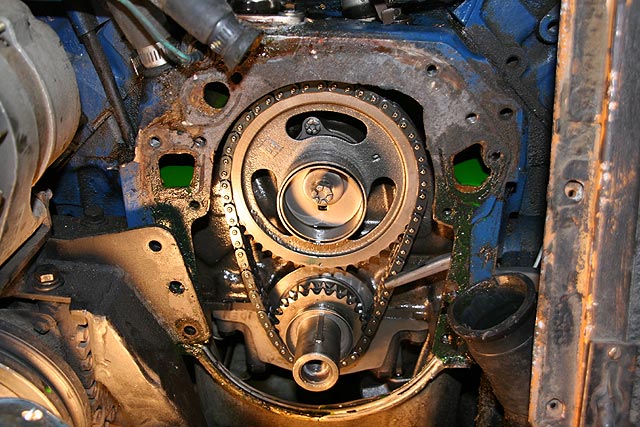
Drain fluids and remove all the engine externals. As I noted earlier, the main reason for this rebuild was to replace a failed camshaft. Since I wanted to remove the camshaft for inspection prior to removing the entire engine, I had to remove all the front engine belts and accessories. This ultimately included the alternator (and bracket), AC compressor, belts, pulleys, vibration damper, water pump, and front cover. Here we see the timing chain set with the front cover removed.
Yes, you can replace the timing chain and/or camshaft with the engine in the car. Now, with that said, you don't have to tear it down this far inside the car if you intend to remove the engine. The front cover, water pump, vibration damper, and pulleys can remain on the engine if you are pulling the whole thing out. The AC compressor should be unbolted and set aside so as to avoid having to un-do the hose couplings.
| Rig up the hoist. I borrowed a really nice engine hoist from my next door neighbor. The club provided me with a 4-point rigging cradle to better suit lifting the engine/transaxle simultaneously. Here we have connected the 4-point cradle to the cylinder heads (front) and the U-joint flanges (rear). Note: don't remove the engine mount bolts or transaxle mount bolts until the hoist is securely rigged. You'll need to use the hoist to lift the weight off the transaxle mounting bolts in order to remove them. | 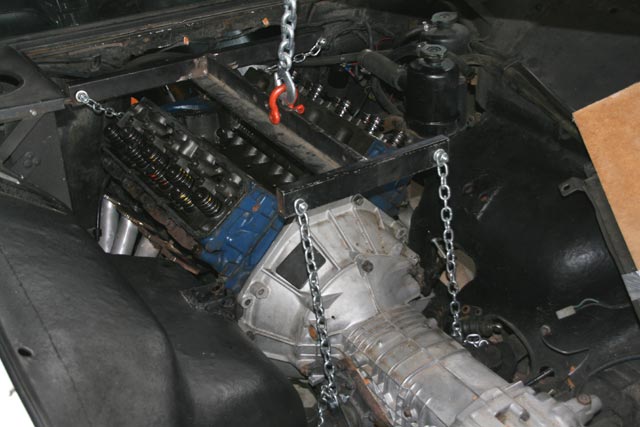 |
||
| Remove mounting bolts. Once the hoist is firmly in place (and with a little bit of tension on the chains), remove the engine mounting bolts. I removed the bolts that go into the block. There are two per side and they are accessed from underneath the car using a long extension with a long breaker bar.
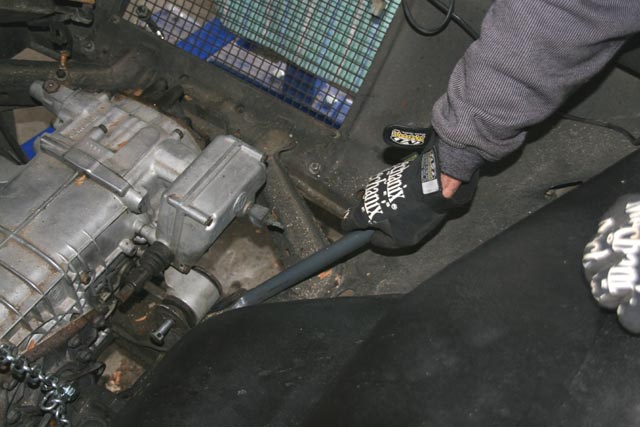
Transaxle mounts are easy to get to. You'll need to apply some tension on the hoist to take the weight off them to get them out. A little help from a pry bar (shown here) might be needed. |
 |
||
| Now for the fun part. Once the engine and transaxle mounting bolts are out, the lifting can begin. Because the Pantera's roof covers a portion of the engine, the engine/transaxle cannot be lifted straight up. Instead, you have to lift the transaxle end first, then pull the whole thing out at an angle. The trick is working the transaxle up and over the rear body panel while not hitting the roof with the engine. We used an auxiliary strap (blue) to help us tilt the assembly as needed. | 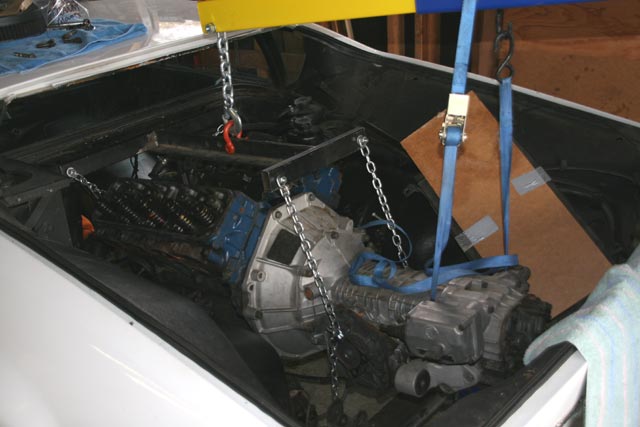 |
||
| Carefully lift the engine/transaxle assembly out. The process takes multiple adjustments of the blue strap to get the right angle. | 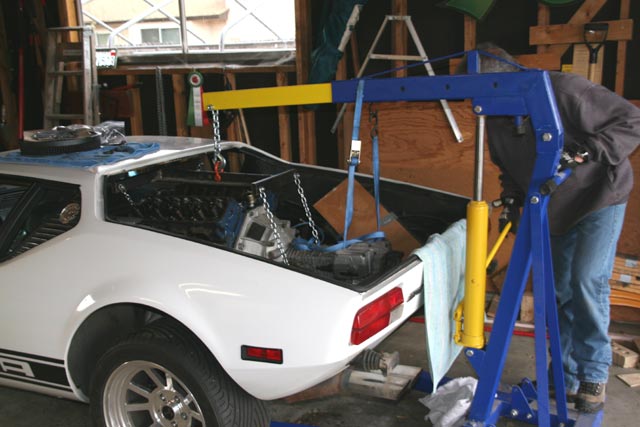 |
||
| Almost there. Another come-along strap (red) was added to allow us to easily adjust tension on the blue strap. This is to create the right weight balance to tilt the engine the way we need it to get it out. | 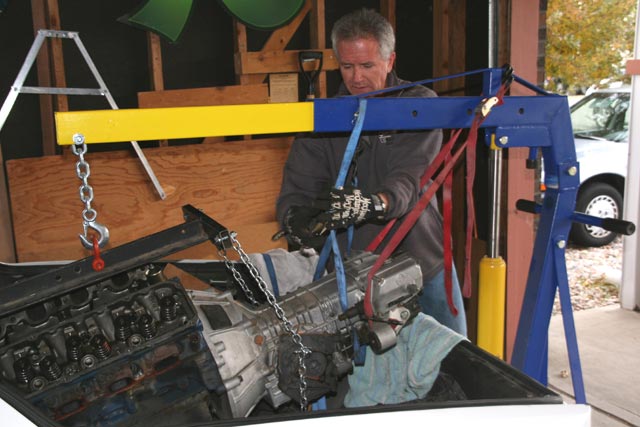 |
||
| Up and over! We've got the transaxle out over the rear bodywork and the engine is well clear of the roof line. The difficult maneuvering is over now. | 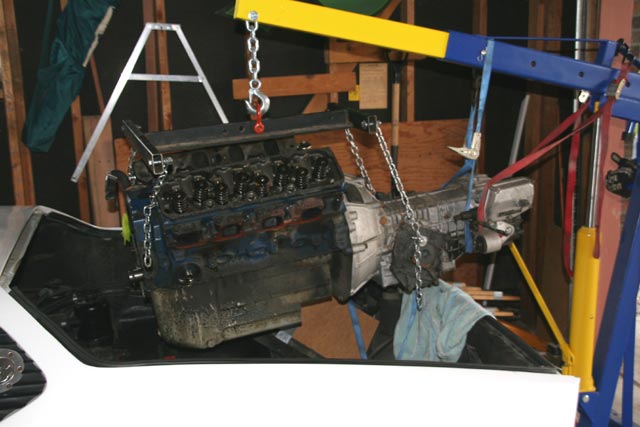 |
||
| Finally, we're in the clear. Dave raises the hoist up high enough to make sure the oil pan clears the body. Then we carefully roll the hoist over to the engine stand. | 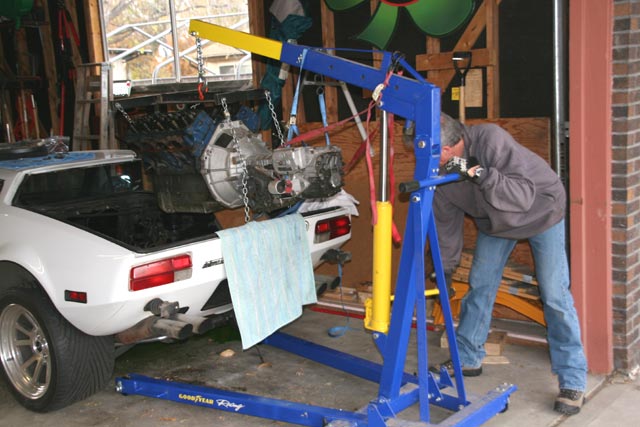 |
||
| Close-up of the front of the block after removal from the car. You can see I've already removed the camshaft, lifters, push rods, and rocker arms, hence the reason why the entire front cover is gone. You don't have to tear it down this far just to get the engine out. However, I wanted remove the camshaft beforehand to make sure the camshaft was really the problem before I tore into the engine. | 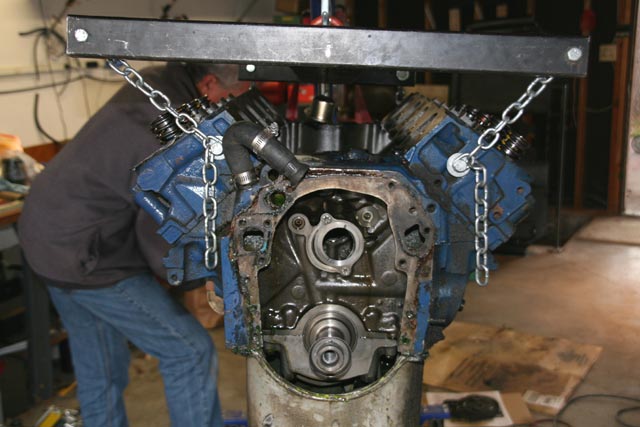 |
||
| Separate the transaxle from the engine. We lowered the assembly down with the hoist and set the engine mount pads on cinder blocks to keep the engine from swaying around while we removed the transaxle. We put a large floor jack under the transaxle to provide support while we removed the bolts from the bellhousing. After separating the transaxle, we placed it onto a furniture dolly and rolled it aside. The furniture dolly was just the right size to support the transaxle. | 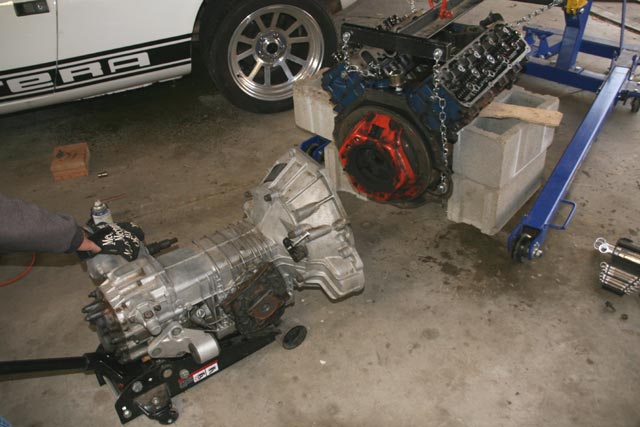 |
||
| Remove the clutch and flywheel. Beware that the flywheel is very heavy, so have somebody holding onto it while you remove the bolts. An impact wrench will make quick work of bolt removal here. | 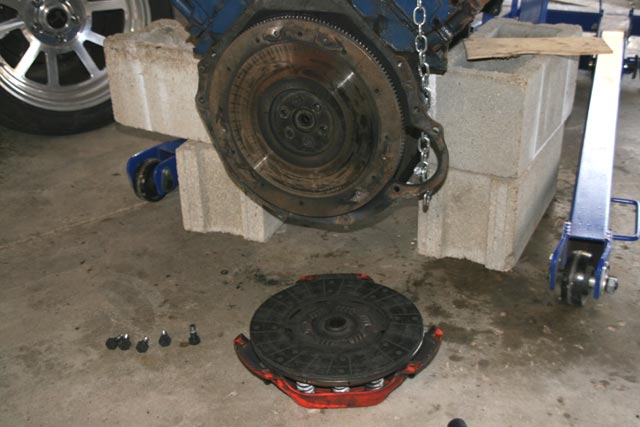 |
||
| Attach the engine to the engine stand. After removing the flywheel, we lifted the engine up with the hoist and positioned the engine stand support "fingers" to match the bellhousing bolt pattern. Make sure everything is good and tight! | 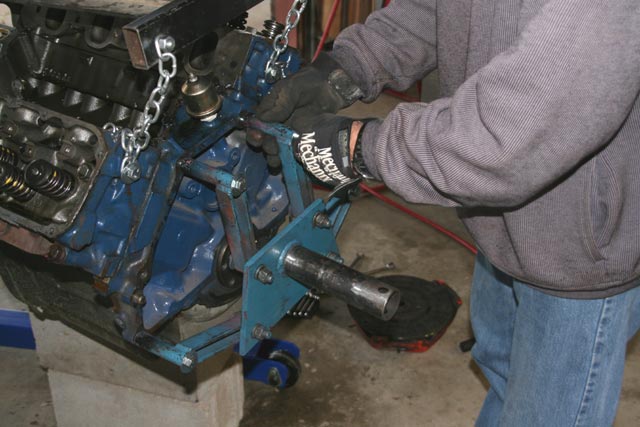 |
||
| Remove the hoist once the engine is firmly attached to the engine stand. | 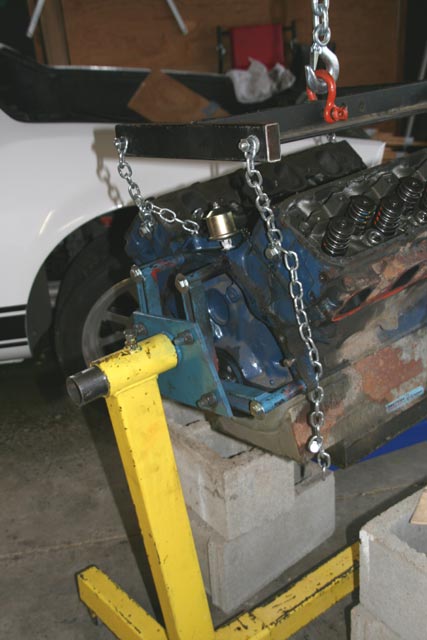 |
||
| The engine is ready for teardown! I rolled the stand to another area of my garage to begin teardown. | 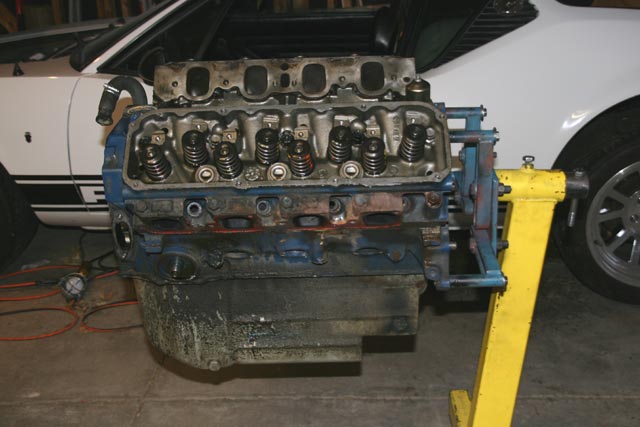 |
||
| Continue to Part 2 (Teardown) photo gallery | ||
Click here to return to the home page.
Contents copyright 2009-2010.